Starting the Project
Have you ever dreamed of having a bookshelf that covered a secret entrance to a space few knew existed. Versions of hidden doors are featured throughout popular fiction like Young Frankenstein, The Addams Family, and even the animated film of Coraline.
I’ve decided to make this dream become a reality. And with that decision comes with the first step of any building project: planning. In this blog post, I plan to walk you through my planning process of the bookshelf door to come. Starting with hand drawings and inspiration, leading into 3D modeled blueprints, and finally a shopping list to move onto the building phase of the project.
The Design
After research and many YouTube videos on this topic. The main problem in building a bookshelf door is the size constraint. The largest point to point width of the bookshelf must be smaller than the door opening to make this project work. For my doorcase that is 30-1/4 inches. The height of the bookshelf is limited by, you guessed it, the height of the door frame: mine is 81 inches.
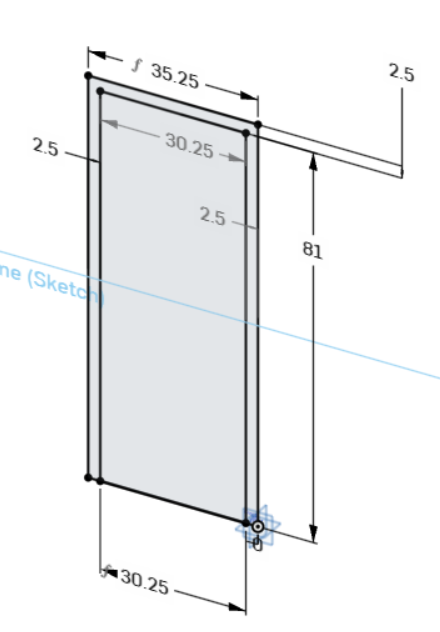
I plan to use 8’x4′ Plywood sheets and 1″x8″ boards to make the majority of the structure of my bookshelf. In addtion to 1″x2″ boards for trim and finish pieces for the front face of the shelf. In an effort to lower costs and only purchase one sheet of Plywood I have yet another constraint. The back, left and right edges, and top need to all be cut from one sheet of 8’x4′ plywood.
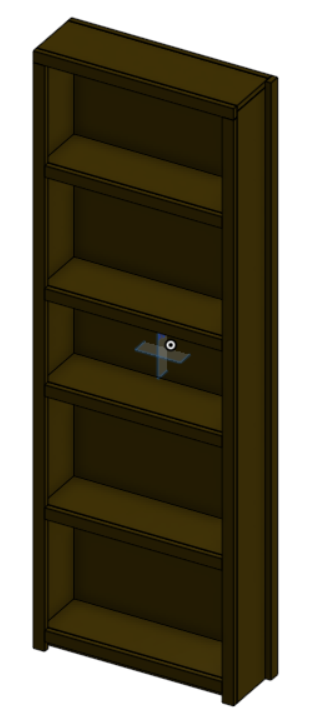
A little bit of math (and a lot of trial an error for a dummy like me), I end up with a basic bookshelf structure that stands 79 inches tall, 7-1/2 inches deep, and 26-1/2 inches wide.
A little bit of math (and a lot of trial an error for a dummy like me), I end up with a basic bookshelf structure that stands 79 inches tall, 7-1/2 inches deep, and 26-1/2 inches wide.
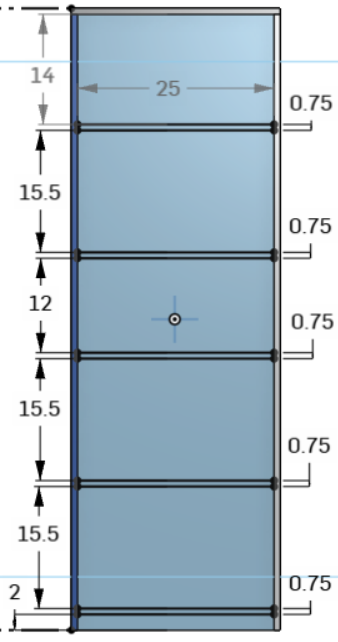
With the structure complete, it was time to decide on number and sizing of shelves. Over way to much time of staring at IKEA bookshelf dimensioned drawings, I settled on 5 total shelves.
I wanted the standard shelf height to be 15-1/2 inches. Mainly based on vibe, but also from IKEA standards. Then, I wanted one smaller shelf, you know, for variety. For the middle smaller shelf, I settled on a nice even 12 inch height. Enough for most modern books, and plenty of space for my eventual secret door knob mechanism. I also decided to leave 2 inches from the floor to the bottom shelf. This will allow me some space to hide footers to help distribute the weight of the cantilever bookshelf off of the hinge.
Add on some trim plates, and a wooden brace to attach a heavy duty piano trim hinge. This leads me to my rudimentary 3D model of the bookshelf.
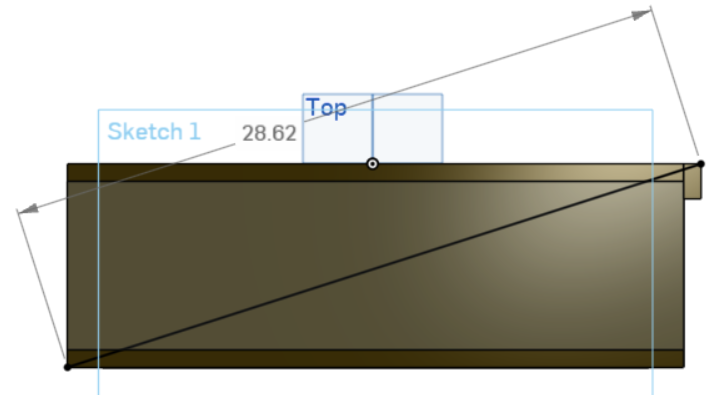
Governed by the max dimension of 30-1/4 inches. I ended up with a hypotenuse of about 29 inches. Plenty of wiggle room, and all plywood pieces fit within a single 8’x4′ sheet!
With this design I have 19 pieces that will need joining.
– Backing
– Top Plate
– Port Edge Plate
– Starboard Edge Plate
– 5 Shelves
– 5 Shelf Trim
– Top Trim
– Port Trim
– Starboard Trim
– Kicker Plate
– And the Hinge Plate
Let me talk about this Hinge Plate a little bit. I mentioned earlier it was to attach the piano hinge, which is true, but not entirely.
The Hinge Plate
A bookshelf door, like any other door, can either open outward or inward. Unlike any other door, a bookshelf door has an additional level of depth, literally. Do you want the shelves to be in the hallway, or to go into the secret room?
The secret room behind my bookshelf is my home theater with the projector screen (or should I say wall) being behind the door way. This leads me to put the increased depth of the bookshelf door into the hallway. Now, that increase depth brings another problem for small spaces or corner doorways. Will the bookshelf hit a wall when it swings out?
My hallway is very thin. Only about 3 inches total extra width past the doorframe. For this reason, if my bookshelf opened into the hallway (a pull door) it would hit the wall before opening fully. This makes it simple, my book shelf will sit in the hallway, and open into the movie room (push door).
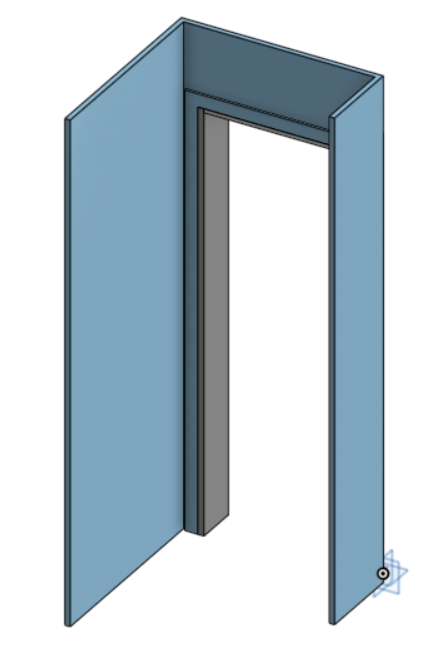
Okay, back to the hinge plate! Why did I add this extra extrusion on the back side of the bookshelf? Most people you see on YouTube will remove the original door frame and fabricate a new one custom fit for the bookshelf. I rent. Long story short, I’m not doing that. That means I have to work with this…
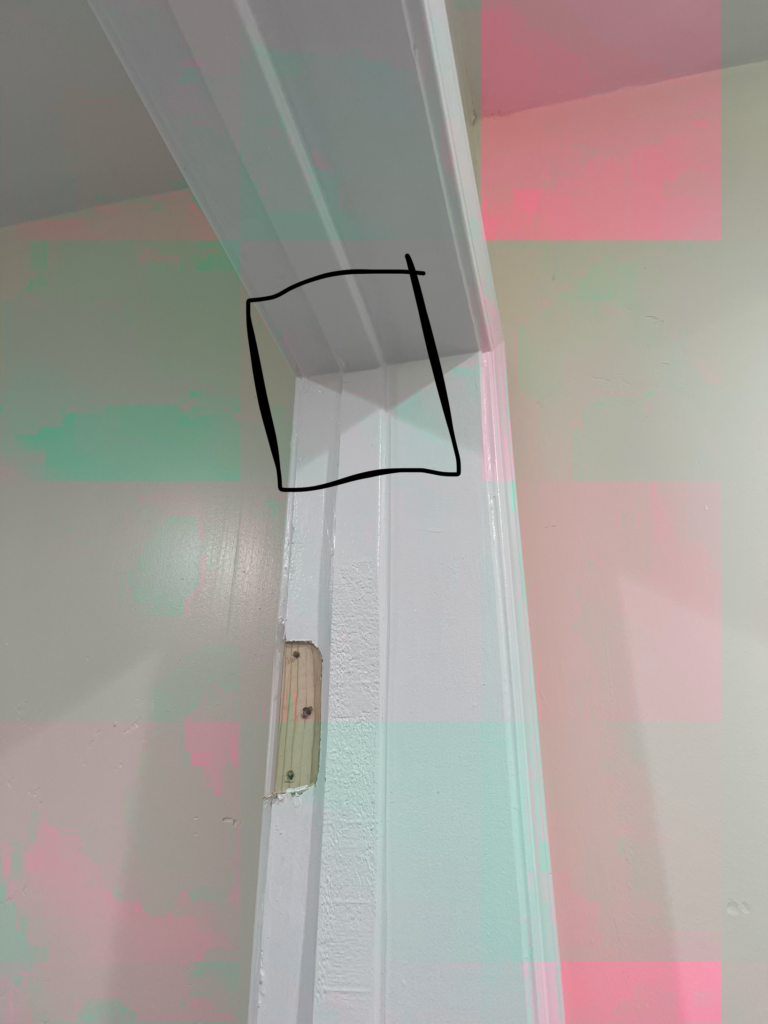
My solution? A 1-1/2inch wide by 3/4 inch thick hinge plate that will butt against the inner edge of that lip. Practically extending the lip to the edge of the door frame, allowing the hinge to sit flat on the frame and be directly connected to the bookshelf. Stay tuned to see if it works!
Finally, since I am a visual person, here is what I expect it to look like. (The person model is a general model of a 6′ person. As you can see, you’ll have to enter at a bit of an angle, but I’m willing to take that sacrifice.) For those who care to know the width between the bookshelf and the door frame is 22 inches. A little tight, but I couldn’t find a solution without having the door open back 90 degrees, which my door frame does not accommodate.
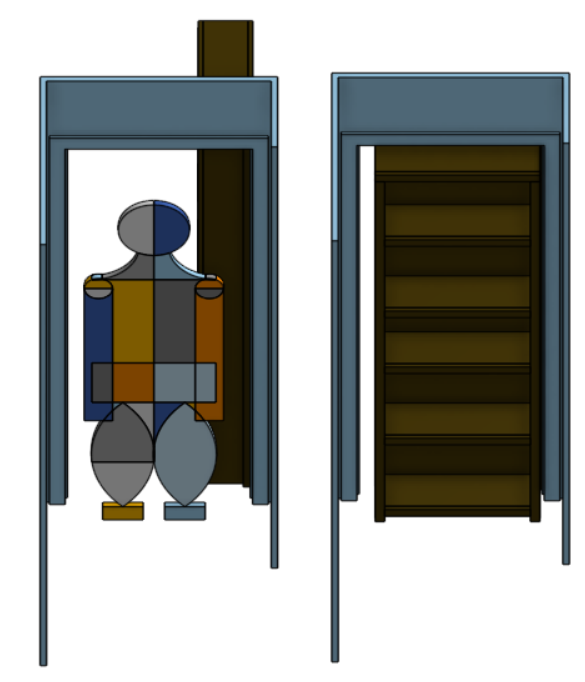
Now, that we can see how it works. We can see a new problem. What about that HUGE gap between the shelf and the frame! Also, isn’t that where the door knob mechanism goes? This problem is amplified in my design compared to the YouTube videos you see online. Most of the bookshelf doors you seen built have the depth of the shelves going into the room. As discussed before, I’m not doing that. I prefer better (bigger) movies than an easier door! This brings us to the the second major design feature of a bookshelf door – the latch.
The Latch
For the latch I am stealing the widely used design of using a normal doorknob latch but removing the knob.
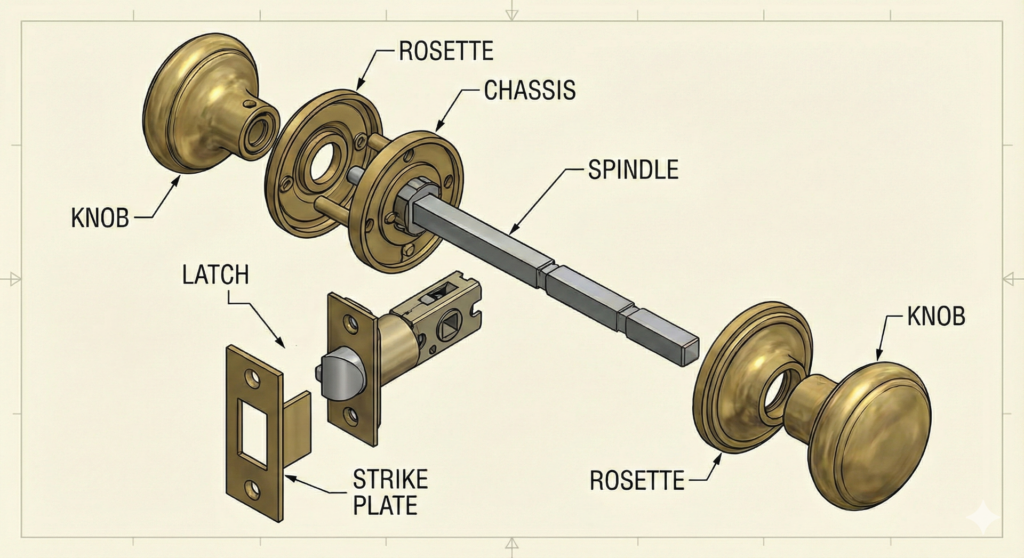
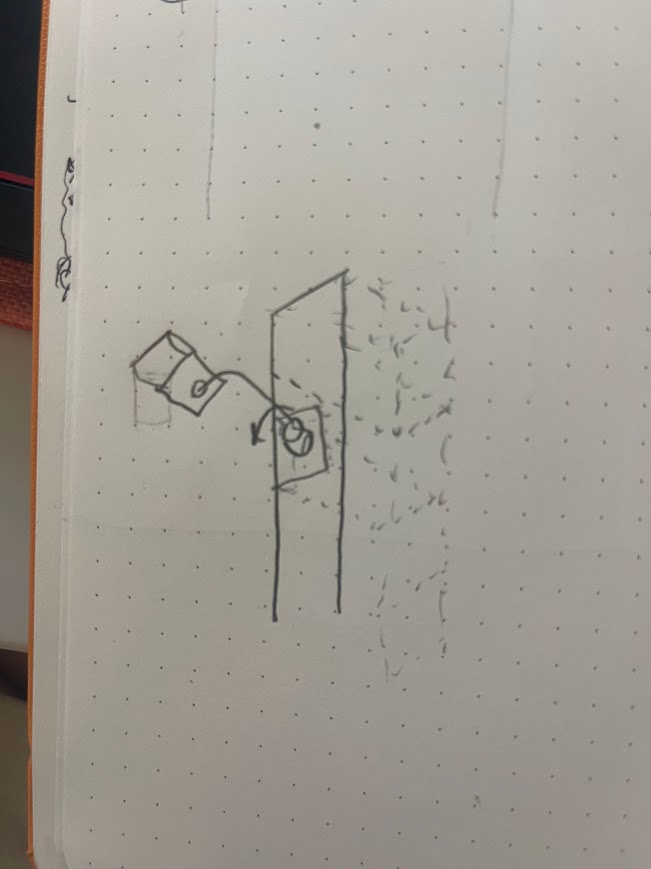
And by removing the knob, I mean removing the Knob, Rosette, Chassis, and Spindle. The Strike Plate is already in place. That leaves just the latch. I plan to take the latch, drill a hole in it, and attach a wire to the latch. That wire will then run through a conduit that bridges the serves as a mount for the latch and bridged the gap from the shelf to the strike plate. When the wire reaches the bookshelf it will run through a small pulley that will transfer a horizonal force needed to a book that you can pull down that will simulate the turning of a door knob. If that was hard to follow here is an even harder to follow drawing I made. Hopefully, it will make sense in a post when I build it!
Okay latch problem solved, for now. Now onto that HUGE GAP!
Hiding the Gap
As I have often reiterated, this book case is not like the YouTube videos where people build ornate trim around the bookshelf to hide that gap, I can’t really do that. The trim would come out 8 inches from the back wall, and again, I’m renting – I’m not doing that!
Instead, my roommate and I have decided to lean into the “Into the Rabbit Hole” theme we are planning to do with the home theater we will cover that gap with faux hanging plants backed by an opaque fabric. This will lead to minimal light intrusion for day time movie binges and hopefully cover those gaps with a bit of whimsical flare! We are imagine this kind of style.

Onto Building
Yeah, that’s the plan. Like any plan, it never survives the first contact with the saw. At least that’s true for me. So stay tuned for further build updates and my lessons learned. Also, as promised here is my shopping list. I MOST DEFINITLY be updating this as I go and realize I need more stuff!
Shopping List
Door Frame:
- Pine Plywood (96”x48”x0.75”) ($60)
[81”x48”]
81”x8”
81”x8”
(80”x32”)
[14”x48”]
28”x8”
Structure:
- Plywood/MDF (97”x49”) ($50)
[80”x49”]
80”x28” (Book Shelf Back)
79.25”x7.25” (Port Edge)
79.25”x7.25” (SB Edge)
(80”x6.25”)
[16”x49”]
[7.25”x49”] & (8.5”x49”]
7.25”x28” (Top)
Shelves:
(1) 1x8x12ft board [.75”x7.25”x144”] [$30]
5 Shelves (.75”x7.25”x26.5” each)
132.5” wood needed
(0.75”x7.25”x10”)
(5) 1”x2”x8 ft Trim: $8
Shelves: 26.5” (x5)
Kicker: 26.5”
Port: 79.25”
SB: 79.25”
Top: 28”
Gallon of paint [$60]